Wednesday, December 18, 2013

Install latest WordPress on Debian Linux

This blog is built on the Google Blogger platform. My new blog however will switch to WordPress, and most likely be hosted by a third-party web hosting company. For now, I want to install WordPress on my home computer to be the staging server. This is where I experiment with new ideas before I upload the final contents to the production WordPress server.

My home computer runs Debian 7 (aka Wheezy) which includes a WordPress package, albeit a little outdated (3.6.1). This post is an overview of how to install the most recent WordPress release on Debian Wheezy.

The instructions below assume you have root privilege and command line access to the server. If you are using a web hosting company, the instructions will not apply because the web hosting company most likely will provide its own tools (e.g., cPanel).

Software Dependencies

To install and run the latest WordPress release, you need to have the following packages already installed.

  • Apache2
  • MySQL5 (version 5.0 or greater)
  • PHP5 (version 5.2.4 or greater)
  • SMTP server (e.g., exim4)

    Although a SMTP server is not required for installation, WordPress cannot send email without one.

It turns out that Debian Wheezy already includes the above software packages with the proper versions in the distribution. You just need to ensure that they are installed on your system.

To verify if a package is installed, use the dpkg command with -l parameter.

The following example indicates that PHP5 is NOT currently installed:

$ dpkg -l php5*
dpkg-query: no packages found matching php5*

If a package is already installed, the dpkg output will look something like this (edited to fit the screen):

$ dpkg -l mysql*
Desired=Unknown/Install/Remove/Purge/Hold
| Status=Not/Inst/Conf-files/Unpacked/halF-conf/Half-inst/trig-aWait/Trig-pend
|/ Err?=(none)/Reinst-required (Status,Err: uppercase=bad)
||/ Name                  Version             Arch    Description
+++-=====================-===================-=======-====================================
ii  mysql-client          5.5.31+dfsg-0+wheez all     MySQL database client (metapackage)
ii  mysql-client-5.5      5.5.31+dfsg-0+wheez amd64   MySQL database client binaries
ii  mysql-common          5.5.31+dfsg-0+wheez all     MySQL database common files
ii  mysql-server          5.5.31+dfsg-0+wheez all     MySQL database server (metapackage)
ii  mysql-server-5.5      5.5.31+dfsg-0+wheez amd64   MySQL database server binaries 
ii  mysql-server-core-5.5 5.5.31+dfsg-0+wheez amd64   MySQL database server binaries

Apache2

To install Apache2:

$ sudo apt-get install apache2

The Apache module mod_rewrite needs to be enabled. Otherwise, WordPress cannot be configured to have more user-friendly URLs. The exact procedure for enabling the module is covered in a later post.

MySQL5

To install MySQL 5:

$ sudo apt-get install mysql-server mysql-client

PHP5

To install PHP5 and related modules:

$ sudo apt-get install php5 php5-mysql php5-gd php5-curl

Notes:

  • php5-gd is only required if you want to enable CAPTCHA checking in your WordPress deployment.
  • Although php5-curl is not a prerequisite of the WordPress core, it is required by some very popular WordPress plugins such as Google Analyticator.

SMTP Server

exim4 is the default SMTP server on Debian wheezy. However, exim4 is configured out of the box for local email delivery only. A later post outlines the steps to configure exim4 to send email to external email servers through Google Gmail.

Install WordPress

  1. Download the latest WordPress tar-ball or zip file from the WordPress web site.
  2. Decompress the downloaded file to a temporary location on your hard drive.

    The examples below decompress the file to ~/tmp (the tmp sub-directory under your home directory).

    For tar-ball:

    $ tar -C ~/tmp/ -zxvf latest.tar.gz
    

    For zip file:

    $ unzip -d ~/tmp/ latest.zip
    
  3. Create database and database user.

    The following mysql commands create a database named wordpress, and a corresponding database user named wp, who has all privileges for the database. Customize with your own database name, user name, and user password.

    $ mysql -u root -p
    Enter password: 
    mysql> CREATE DATABASE wordpress CHARACTER SET utf8;
    Query OK, 1 row affected (0.01 sec)
    mysql> GRANT ALL PRIVILEGES ON wordpress.* TO 'wp'@'localhost' IDENTIFIED BY 'REPLACE_WITH_YOUR_USER_PASSWORD';
    Query OK, 0 rows affected (0.00 sec)
    mysql> GRANT ALL PRIVILEGES ON wordpress.* TO 'wp'@'%' IDENTIFIED BY 'REPLACE_WITH_YOUR_USER_PASSWORD';
    Query OK, 0 rows affected (0.00 sec)
    mysql> FLUSH PRIVILEGES;
    Query OK, 0 rows affected (0.00 sec)
    
  4. Create configuration file.

    Rename the sample configuration file.

     
    $ cd ~/tmp/wordpress
    $ cp wp-config-sample.php wp-config.php
    

    Edit ~/tmp/wordpress/wp-config.php.

    Locate the following lines, and replace the values with your own values.

    define('DB_NAME', 'wordpress');
    define('DB_USER', 'wp');
    define('DB_PASSWORD', 'REPLACE_WITH_YOUR_USER_PASSWORD');
    
    define('AUTH_KEY', 'put your unique phrase here');
    define('SECURE_AUTH_KEY', 'put your unique phrase here');
    define('LOGGED_IN_KEY',   'put your unique phrase here');
    define('NONCE_KEY', 'put your unique phrase here');
    define('AUTH_SALT', 'put your unique phrase here');
    define('SECURE_AUTH_SALT', 'put your unique phrase here');
    define('LOGGED_IN_SALT', 'put your unique phrase here');
    define('NONCE_SALT', 'put your unique phrase here');
    

    For the security keys and SALTs, replace the values with long, random strings of gibberish. For instance, something like t`DK%X:>xy|e-Z(BXb/f(Ur`8#~UzUQG-^_Cs_GHs5U-&Wb?pgn^p8(2@}IcnCa| is a good choice.

  5. Copy WordPress to the web server's document root directory.

    For Debian Wheezy, the Apache document root directory is located at /var/www. In the example below, I put wordpress under a subdirectory named myblog. The URL of the blog will look like http://localhost/myblog.

    $ sudo mkdir /var/www/myblog
    $ sudo cp -pr ~/tmp/wordpress/*  /var/www/myblog/
    
  6. Change owner/group of WordPress files to the web server user.

    To use the one-click upgrade feature of WordPress after the initial install, the web server must be granted the proper file permissions to update the WordPress-related files.

    First, identify the user under which the Apache web server executes.

    $ ps aux |grep -i apache
    ...
    www-data  7012  0.0  0.1 169576 27472 ?        S    08:59   0:01 /usr/sbin/apache2 -k start
    ...
    

    Then, modify owner and group of WordPress files to that user, www-data.

    $ sudo chown -R www-data:www-data /var/wwww/myblog
    [sudo] password for peter: 
    
  7. Run the install script.

    Open a browser, and enter this URL:
    http://localhost/myblog/wp-admin/install.php

  8. Fill in the information, and click Install.
  9. Login using the credentials you just created.

    The WordPress dashboard appears.

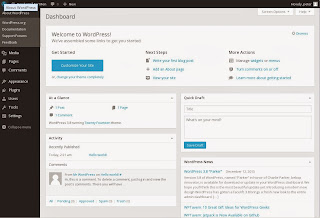
The WordPress web site claims that if you know what you are doing, the install will take only 5 minutes. For Debian Wheezy, given that all the pre-requisite software dependencies are already satisfied by the base distribution, this claim may not be that far from the truth.

Let me know your experience.

Below are my other posts on WordPress:

Thursday, December 12, 2013

How to install pre-packaged software collections after the initial install

During a fresh Debian install, you can specify the installation of pre-assembled collections of related software packages that together provide a high-level functionality, for example, Web Server. The install screen may look something like this:

If you select Web server, the install program will take care of installing the right packages for you. You don't need to know the names of the individual web server packages. The install program will install Apache2 automatically.

What to do if you have declined to install a collection, only to realize later that you do need it?

After the initial install, you can always execute the tasksel command. It brings up the same install screen as above as if you are arriving at the package configuration step in a text-based install.

$ sudo tasksel

If your base system does not have the tasksel command installed, install it like this:

$ sudo apt-get install tasksel

It is most comforting to know that you need not be perfect at install time in predicting the required software collections. You can always add a software collection using the tasksel command after the initial install.

Sunday, December 8, 2013

Dual booting Debian Wheezy and Windows 7

My ASUS CM6870 desktop computer came pre-installed with Windows 7. The following outlines the steps to set up dual boot of Debian Wheezy and Windows 7.

  1. Re-partition your hard drive.

    Initially, Windows takes up the entire hard drive. Two 'letter' drives were allocated on this disk: C, and D. The C: drive holds the Windows system with plenty of unused space. The D: drive stores user data, and is practically empty.

    Before installing Linux, you need to re-partition the hard drive to allocate space to Linux.

    I used the native Windows 7 Disk Manager for the task. Specifically, I shrunk the C: drive and deleted the D: drive entirely. Be sure that you leave enough unused space in the C: drive to hold future user data.

  2. Create Debian install media.
    • Download the install ISO image from the Debian web site. I chose the Live install ISO.
    • Burn the ISO onto a CD or DVD.

      If you are going to dual boot with Windows 7, don't copy the iso onto the USB stick. The Debian installer running from the USB stick boots in EFI mode. Your Windows 7 system was most likely installed in BIOS mode. As a result, the Debian installer may not detect the Windows 7 partitions. You may not be able to boot into Windows 7 if you run the Linux installer from the USB stick.

  3. Insert Live CD/DVD and reboot.
  4. In the boot menu, select Graphical Install, and follow the on-screen instructions.
  5. At the Partition Disks step, select Manual.

    To preserve the existing Windows partitions, manually configure the disk.

  6. While installing the GRUB bootloader, the installer will detect other operating systems residing on the hard disk.

    In this case, it does detect a Windows operating system: Vista (rather than Windows 7). That is 'normal' for Windows 7. Click Continue.

  7. Continue with the instructions on the screen until you finish the installation.

The next time you reboot the computer, the bootloader will display a menu which includes Windows 7 as well as Debian Wheezy.

Wednesday, December 4, 2013

KDE4: how to relocate icons on the Plasma desktop

As a long-time GNOME user, I had to overcome some initial learning curve to the KDE4 desktop environment. My first puzzlement is how to re-position icons on the desktop.

I tried to click and drag the icon. However, clicking the icon immediately runs the associated application. That was not my intention.

The trick is to click on the side panel which only appears when you mouse over the icon. Drag the side panel to the target location, and release.

Be careful to only click the background of the side panel, not any item on the panel. Clicking an item on the panel will execute the associated action, such as removing the icon, but will not relocate the icon.

While the technique may not be that intuitive to many users, I do not consider it a show stopper to using KDE4. For me, the jury is still out on whether to use KDE4 regularly.

Please share any pointer to help GNOME users to get comfortable with KDE4.

Sunday, December 1, 2013

KDE4: Show the Trash Can and Home icons

My earlier post shows how to display the Trash Can on the GNOME 3 desktop. Not to be out-done, KDE4 also hides the Trash Can by default. This post outlines the steps to enable the display of the Trash Can on KDE4. I'll also show how to set up the Home directory icon on the KDE4 desktop.

To display the Trash Can:

  1. Click anywhere on the desktop background.

    A menu is displayed.

  2. Click Add Widgets.
  3. Search for the trashcan widget by entering 'trash' in the search box.
  4. Double click the trashcan widget returned by the search.

You now have a Trash Can displayed on your desktop. You can drag & drop files onto the trash can to delete files.

To set up a Home directory icon on the desktop:

  1. Run your favourite File Manager (say Dolphin).
  2. Navigate to your Home directory (/home/username/).
  3. Drag and drop the Home directory onto the target location of the desktop that you want the icon to appear.

    A widget menu appears.

  4. Click Icon to create an icon for your Home directory.

    An icon labelled peter is created.

  5. Clicking the icon labelled peter runs the Dolphin file manager and opens your Home directory.

The icon labelled peter is essentially your Home icon. It'd be even better if I can rename the icon to Home. But, I can't find a way to do it. The user name suffices.

Tuesday, November 26, 2013

How to connect to Bluetooth headset/soundbar/speaker

Most modern laptops are equipped with the Bluetooth radio. It means that you can use a Bluetooth mouse and keyboard as your input device, and a Bluetooth headset, soundbar, or speaker for your sound output. This article gives an example of how to connect your Linux laptop to a Bluetooth soundbar.

Device model

My laptop is a DELL Vostro 1015 running Ubuntu 12.04.3 LTS ("precise"). The bluez Bluetooth stack is of version 4.98.

My soundbar is the Panasonic HTB450. According to the Owner's Manual, this model features Bluetooth V2.1 + EDR. Note that this model is not a Bluetooth Low Energy device. The method in this blog post has only been tested on non-Low-Energy Bluetooth devices.

Getting ready

  • Install the bluez-tools package on your Linux computer (assuming it is Debian-based):
    $ sudo apt-get install bluez-tools
    
  • Power up the Panasonic soundbar. Make sure that Bluetooth is selected as the audio source, and that the device is configured to be discoverable to other Bluetooth devices.
  • The soundbar and the Linux laptop must be within a "short" distance of each other (10 feet to be safe).

Connection procedure

The following assumes you have only one Bluetooth adapter in your Linux computer. If you have more than 1, use the hciconfig command to find out the name of the Bluetooth adapter to use for connection, and specify that device name as a parameter to the commands below.

  1. Discover the soundbar.

    Run the following command on Linux to scan for the soundbar. The key piece of data to jot down is the Bluetooth address of the soundbar (e.g., 00:0B:97:0F:C5:2D).

    $ bt-adapter -d
    Searching...
    [00:0B:97:0F:C5:2A]
      Name: SC-HTB450
      Alias: SC-HTB450
      Address: 00:0B:97:0F:C5:2D
      Icon: audio-card
      Class: 0x240404
      LegacyPairing: 0
      Paired: 0
      RSSI: -56
    Done
    

    You can also scan using the hcitool command:

    $ hcitool scan
    Scanning ...
     00:0B:97:0F:C5:2D    SC-HTB450
    
  2. Pair with the soundbar.

    This step is only necessary if the 2 devices have never been "paired" before.

    To pair, run the bt-device command with the Bluetooth address from step 1 as the parameter.

    $ bt-device -c 00:0B:97:0F:C5:2D
    Connecting to: 00:0B:97:0F:C5:2D
    Agent registered
    Agent released
    Done
    

    You can verify the result by listing the paired devices:

    $ bt-device -l
    Added devices:
    SC-HTB450 (00:0B:97:0F:C5:2D)
    
  3. Connect audio output to soundbar.
    $ bt-audio -c 00:0B:97:0F:C5:2D
    Connecting to an audio service
    Audio service is connected
    

    You can verify the connection by querying information about the Bluetooth device name (SC-HTB450). Note that the output contains a line with Connected equals 1 (meaning success!)

    $ bt-device -i SC-HTB450
    [00:0B:97:0F:C5:2A]
      Name: SC-HTB450
      Alias: SC-HTB450 [rw]
      Address: 00:0B:97:0F:C5:2D
      Icon: audio-card
      Class: 0x240404
      Paired: 1
      Trusted: 0 [rw]
      Blocked: 0 [rw]
      Connected: 1
      UUIDs: [AudioSink, AVRemoteControl]
    
  4. Make soundbar a trusted device.

    After the soundbar is turned off and then on again, the Bluetooth audio connection is NOT automatically reconnected. To make re-connection automatic, run the following command to designate the soundbar as a trusted device.

    $ bt-device --set  SC-HTB450 Trusted 1
    Trusted: 0 -> 1
    

    Note that if you reboot your laptop, you need to manually re-connect using bt-audio -c as shown above (but pairing can be skipped). This is true even when the Bluetooth device is designated as trusted.

Playback sound

The audio connection is now made between your laptop and the soundbar.

You can play your favourite sound track and the sound will come from the soundbar, instead of the built-in laptop speakers.

p.s. You may be interested in my 2 earlier posts on Bluetooth:

Thursday, November 14, 2013

How to modify the user-friendly Bluetooth local name

Each Bluetooth device has a user-friendly local name as well as an unique 48-bit hexadecimal device address (eg, C0:F8:DA:9D:CF:DF). The default local name may be too generic, eg, ubuntu-0, to identify you to the rest of the world. This post shows you how to assign a more descriptive local name.

To find out the current local name of the Bluetooth device, execute the following command:

$ hciconfig -a
hci0: Type: BR/EDR  Bus: USB
 BD Address: C0:F8:DA:9D:CF:DF  ACL MTU: 1022:8  SCO MTU: 121:3
 UP RUNNING PSCAN ISCAN 
    <..sniped>
 Link policy: RSWITCH HOLD SNIFF 
 Link mode: SLAVE ACCEPT 
 Name: 'ubuntu-0'
 Class: 0x6e0100
 Service Classes: Networking, Rendering, Capturing, Audio, Telephony
 Device Class: Computer, Uncategorized
 HCI Version: 3.0 (0x5)  Revision: 0x9999
 LMP Version: 3.0 (0x5)  Subversion: 0x9999
 Manufacturer: Atheros Communications, Inc. (69)

The name that other Bluetooth devices will see is ubuntu-0. Suppose you want to rename the device penguin. Execute the following command with root privilege:

$ sudo hciconfig hci0 name penguin

To verify that the name was modified:

$ hciconfig -a
hci0: Type: BR/EDR  Bus: USB
 BD Address: C0:F8:DA:9D:CF:DF  ACL MTU: 1022:8  SCO MTU: 121:3
 UP RUNNING PSCAN ISCAN 
    <..sniped>
 Link policy: RSWITCH HOLD SNIFF 
 Link mode: SLAVE ACCEPT 
 Name: 'penguin'
 Class: 0x6e0100
 Service Classes: Networking, Rendering, Capturing, Audio, Telephony
 Device Class: Computer, Uncategorized
 HCI Version: 3.0 (0x5)  Revision: 0x9999
 LMP Version: 3.0 (0x5)  Subversion: 0x9999
 Manufacturer: Atheros Communications, Inc. (69)

The local name was only temporarily modified to penguin. It will revert back to ubuntu-0 at the next system reboot or the next Bluetooth daemon restart.

To make the change permanent, manually edit the Bluetooth configuration file. The config file is located in /var/lib/bluetooth/ under the sub-directory named by the Bluetooth device address (see below).

$ cat /var/lib/bluetooth/C0\:F8\:DA\:9D\:CF\:DF/config 
name ubuntu-0
pairable yes
class 0x6e0100
onmode connectable
mode connectable

Modify the line name ubuntu-0 to name penguin, and save the file.

$ sudo vi /var/lib/bluetooth/C0\:F8\:DA\:9D\:CF\:DF/config 

Now, your new Bluetooth local name will persist even after a system reboot.

If you are interested in Bluetooth, please see my earlier post:

Thursday, November 7, 2013

Verify if a Linux computer has the Bluetooth hardware

Many laptops today come with a Bluetooth radio. For desktops however, most likely you need to go buy a Bluetooth USB dongle.

If you don't know whether your computer has the Bluetooth hardware, the following command will help you find out.

$ lsusb |grep Bluetooth
Bus 004 Device 003: ID 0cf3:3005 Atheros Communications, Inc. AR3011 Bluetooth
$ 

If the search returns a Bluetooth device, it indicates strongly that your computer has a Bluetooth chip in it.

Note that simply searching for Bluetooth in your kernel ring buffer is NOT conclusive. My Debian desktop computer does not have the Bluetooth radio, but dmesg returns Bluetooth nevertheless.

$ dmesg |grep -i Bluetooth
[   16.383573] Bluetooth: Core ver 2.16
[   16.383591] Bluetooth: HCI device and connection manager initialized
[   16.383593] Bluetooth: HCI socket layer initialized
[   16.383595] Bluetooth: L2CAP socket layer initialized
[   16.383600] Bluetooth: SCO socket layer initialized
[   16.404892] Bluetooth: RFCOMM TTY layer initialized
[   16.404900] Bluetooth: RFCOMM socket layer initialized
[   16.404902] Bluetooth: RFCOMM ver 1.11
[   18.273794] Bluetooth: BNEP (Ethernet Emulation) ver 1.3
[   18.273797] Bluetooth: BNEP filters: protocol multicast

Armed with the Bluetooth hardware, you are now ready to pair with a Bluetooth device.

If you are interested in Bluetooth, please see my other post:

Tuesday, November 5, 2013

Connect Android and Linux using USB

I have a Samsung Galaxy Tab 2 tablet, running Android 4.1.1 (aka Jelly Bean). I'd like to transfer some files from the tablet to my Linux server running Debian 7.2 (aka Wheezy). The Android tablet connects via Wi-Fi to the same LAN as the Linux server.

There are many ways to transfer files between the 2 devices. For example, you could install an Android app named AirDroid which lets you manage your Android device from a desktop web browser, including file transfer. In this post, I'll go another route, an arguably more direct and basic one. I'll connect the 2 using a USB cable.

  1. Connect the 2 devices using a USB cable.
  2. With the Android device, navigate to the home page.
  3. Swipe down from the top of the page.

    You will see a message "Connected as a media device. Touch for other USB options"

  4. Tap on the message.

    The resulting screen specifies how you want the Android device to connect: as a Media device(MTP) or a Camera (PTP).

    While Linux has some support for MTP, I found it much easier to connect as PTP.

  5. Tap on the Camera (PTP) checkbox.
  6. Swipe down from home page again, and you will see that the tablet is mounted as a camera.
  7. Reset the USB device under Linux.

    The simplest way is to unplug the USB cable from both ends, and plug it back in.

  8. Make sure that the Android device is mounted on your Linux server.

    On my Linux GNOME 3 desktop, I clicked on the Computer icon, and the Android device was detected (GT-P3113). Click the device to mount it.

  9. Run your favourite file manager application on Linux, and proceed to transfer files.

You can use the above method to transfer files if you happen to have (the right) USB cable around to connect the 2 devices. If cables is not your preference, you may want to look into the Android app Airdroid.

Saturday, October 19, 2013

How to connect to a WPA/WPA2 WiFi network using Linux command line

This is a step-to-step guide for connecting to a WPA/WPA2 WiFi network via the Linux command line interface. The tools are:

  • wpa_supplicant
  • iw
  • ip
  • ping

iw is the basic tool for WiFi network-related tasks, such as finding the WiFi device name, and scanning access points. wpa_supplicant is the wireless tool for connecting to a WPA/WPA2 network. ip is used for enabling/disabling devices, and finding out general network interface information.

The steps for connecting to a WPA/WPA2 network are:

  1. Find out the wireless device name.
    $ /sbin/iw dev
    phy#0
    	Interface wlan0
    		ifindex 3
    		type managed
    

    The above output showed that the system has 1 physical WiFi card, designated as phy#0. The device name is wlan0. The type specifies the operation mode of the wireless device. managed means the device is a WiFi station or client that connects to an access point.

  2. Check that the wireless device is up.
    $ ip link show wlan0
    3: wlan0: (BROADCAST,MULTICAST) mtu 1500 qdisc noop state DOWN mode DEFAULT qlen 1000
        link/ether 74:e5:43:a1:ce:65 brd ff:ff:ff:ff:ff:ff
    

    Look for the word "UP" inside the brackets in the first line of the output.

    In the above example, wlan0 is not UP. Execute the following command to bring it up:

    $ sudo ip link set wlan0 up  
    [sudo] password for peter: 
    

    Note: you need root privilege for the above operation.

    If you run the show link command again, you can tell that wlan0 is now UP.

    $ ip link show wlan0
    3: wlan0: (NO-CARRIER,BROADCAST,MULTICAST,UP) mtu 1500 qdisc mq state DOWN mode DEFAULT qlen 1000
        link/ether 74:e5:43:a1:ce:65 brd ff:ff:ff:ff:ff:ff
    
  3. Check the connection status.
    $ /sbin/iw wlan0 link
    Not connected.
    

    The above output shows that you are not connected to any network.

  4. Scan to find out what WiFi network(s) are detected
    $ sudo /sbin/iw wlan0 scan
    BSS 00:14:d1:9c:1f:c8 (on wlan0)
            ... sniped ...
    	freq: 2412
    	SSID: gorilla
    	RSN:	 * Version: 1
    		 * Group cipher: CCMP
    		 * Pairwise ciphers: CCMP
    		 * Authentication suites: PSK
    		 * Capabilities: (0x0000)
            ... sniped ...
    

    The 2 important pieces of information from the above are the SSID and the security protocol (WPA/WPA2 vs WEP). The SSID from the above example is gorilla. The security protocol is RSN, also commonly referred to as WPA2. The security protocol is important because it determines what tool you use to connect to the network.

  5. Connect to WPA/WPA2 WiFi network.

    This is a 2 step process. First, you generate a configuration file for wpa_supplicant that contains the pre-shared key ("passphrase") for the WiFi network.

    $ sudo -s
    [sudo] password for peter: 
    $ wpa_passphrase gorilla >> /etc/wpa_supplicant.conf 
    ...type in the passphrase and hit enter...
    

    wpa_passphrase takes the SSID as the single argument. You must type in the passphrase for the WiFi network gorilla after you run the command. Using that information, wpa_passphrase will output the necessary configuration statements to the standard output. Those statements are appended to the wpa_supplicant configuration file located at /etc/wpa_supplicant.conf.

    Note: you need root privilege to write to /etc/wpa_supplicant.conf.

    $ cat /etc/wpa_supplicant.conf 
    # reading passphrase from stdin
    network={
    	ssid="gorilla"
    	#psk="testtest"
    	psk=4dfe1c985520d26a13e932bf0acb1d4580461dd854ed79ad1a88ec221a802061
    }
    

    The second step is to run wpa_supplicant with the new configuration file.

    $ sudo wpa_supplicant -B -D wext -i wlan0 -c /etc/wpa_supplicant.conf
    

    -B means run wpa_supplicant in the background.

    -D specifies the wireless driver. wext is the generic driver.

    -c specifies the path for the configuration file.

    Use the iw command to verify that you are indeed connected to the SSID.

    $ /sbin/iw wlan0 link
    Connected to 00:14:d1:9c:1f:c8 (on wlan0)
    	SSID: gorilla
    	freq: 2412
    	RX: 63825 bytes (471 packets)
    	TX: 1344 bytes (12 packets)
    	signal: -27 dBm
    	tx bitrate: 6.5 MBit/s MCS 0
    
    	bss flags:	short-slot-time
    	dtim period:	0
    	beacon int:	100
    
  6. Obtain IP address by DHCP
    $ sudo dhclient wlan0
    

    Use the ip command to verify the IP address assigned by DHCP. The IP address is 192.168.1.113 from below.

    $ ip addr show wlan0
    3: wlan0:  mtu 1500 qdisc mq state UP qlen 1000
        link/ether 74:e5:43:a1:ce:65 brd ff:ff:ff:ff:ff:ff
        inet 192.168.1.113/24 brd 192.168.1.255 scope global wlan0
        inet6 fe80::76e5:43ff:fea1:ce65/64 scope link 
           valid_lft forever preferred_lft forever
    
  7. Add default routing rule.

    The last configuration step is to make sure that you have the proper routing rules.

    $ ip route show
    192.168.1.0/24 dev wlan0  proto kernel  scope link  src 192.168.1.113 
    

    The above routing table contains only 1 rule which redirects all traffic destined for the local subnet (192.168.1.x) to the wlan0 interface. You may want to add a default routing rule to pass all other traffic through wlan0 as well.

    $ sudo ip route add default via 192.168.1.254 dev wlan0
    $ ip route show
    default via 192.168.1.254 dev wlan0 
    192.168.1.0/24 dev wlan0  proto kernel  scope link  src 192.168.1.113 
    
  8. ping external ip address to test connectivity
    $ ping 8.8.8.8
    PING 8.8.8.8 (8.8.8.8) 56(84) bytes of data.
    64 bytes from 8.8.8.8: icmp_req=1 ttl=48 time=135 ms
    64 bytes from 8.8.8.8: icmp_req=2 ttl=48 time=135 ms
    64 bytes from 8.8.8.8: icmp_req=3 ttl=48 time=134 ms
    ^C
    --- 8.8.8.8 ping statistics ---
    3 packets transmitted, 3 received, 0% packet loss, time 2000ms
    rtt min/avg/max/mdev = 134.575/134.972/135.241/0.414 ms
    

The above series of steps is a very verbose explanation of how to connect a WPA/WPA2 WiFi network. Some steps can be skipped as you connect to the same access point for a second time. For instance, you already know the WiFi device name, and the configuration file is already set up for the network. The process needs to be tailored according to your situation.

Thursday, October 17, 2013

GNOME 3: Get your Trash Can and Computer icons back

I recently upgraded from Debian 6 (aka "squeeze") to 7 (aka "wheezy"). Debian wheezy runs a newer version of the desktop environment, GNOME 3 (up from GNOME 2). With GNOME 3, certain desktop actions that users were able to do in GNOME 2 have been disabled by default.

Below are some desktop features removed by default that I find particularly annoying:

  • No Trash Can icon on the desktop.
  • No Computer or Home icon on the desktop.
  • Right clicking on the desktop does not bring up a menu.
  • Files in your Desktop directory (/home//Desktop) do not appear on the desktop.

It turns out that with a few easy steps you can add those features back to your desktop. Here is how:

  1. Login to GNOME desktop.
  2. Click Applications/System Tools/Preferences/Advanced Settings.
  3. Click Desktop
  4. Click to enable the Have file manager handle the desktop setting.

    This will restore the right click to the desktop as well as display files in your Desktop directory.

    Note that this setting must be enabled if you want to display the Computer/Home/Trash icons.

  5. Click to enable Computer icon visible on desktop setting.
  6. Click to enable Home icon visible on desktop setting.
  7. Click to enable Trash icon visible on desktop setting.

With the above customization, GNOME 3 is a little more hospitable to its desktop and laptop users.

Saturday, October 12, 2013

How to use the screen command to run a program unattended

screen is a powerful terminal session manager with many use cases. One such use case is to start a long-running Command Line Interface (CLI) program in a terminal session, detach the session while leaving the program running unattended, logout, and return to the same session later from another terminal.

Let's examine how you would use screen in a real-life situation.

Imagine the time is 15 minutes to the end of your work day. But before you can leave, you have to run a program that will run for an hour. You don't want to wait around until it finishes in order to check the output. What you want is to start the program, leave, and check the output when you get home.

Assuming you have access to the work machine from home, this is how you would do it using screen.

  1. Start a new screen session.

    From a shell, run this command:

    $ screen -S mondaySession
    

    Note that the existing screen is immediately reset to blank. You have a new terminal session.

    The -S parameter lets you specify a name for the session. This makes it easier for you to come back to it later.

  2. Start the hour-long program.
    $ ls -al *.sh
    -rwxr-xr-x 1 peter peter  399 Oct  6  2013 long.sh
    $ ./long.sh
    ...
    
  3. Detach the session.

    Detaching the session does not mean you are suspending its operation. In fact, the session, including the long program, is still running in the background. Detaching a session leaves the program running unattended while you travel home.

    To detach a session, send the appropriate command keyboard shortcut to screen. While a screen session is active, screen listens constantly for keyboard shortcuts. For this specific example, hit the key sequence Control-a d. This means press the Ctrl key and the 'a' key together and release, and then press the 'd' key.

    Note: All screen keyboard shortcuts begin with the Control-a key sequence.

    The terminal session is collapsed, and disappear from your sight for now. The prior session is brought back. You will see the session status as "detached":

    $ screen -S mondaySession
    [detached]
    $
    
  4. Logout

    At this point, you can even log out, and the session still persists.

  5. Resume the session.

    After you get home, login to the work machine, and run the following command.

    $ screen -r mondaySession
    

    The terminal session is brought back. Note that you have access to the session as if you have never left it before, including its history, and the output of the long program that you started earlier.

    $ ls -al *.sh
    -rwxr-xr-x 1 peter peter  399 Oct  6  2013 long.sh
    $ ./long.sh
    .............................
    Program ended successfully. 
    

Disclaimer:
No discussion nowadays about screen is complete without the following disclaimer. tmux is a newer command that does similar things as screen. You can achieve the same effect described in this blog post using tmux. For now, however, you are more likely to find screen installed on a Linux box than tmux. I still find it useful to know the screen command.

Tuesday, October 8, 2013

Allow root ssh login with public key authentication only

Often, ssh is configured to disallow root to login directly. To login, root first logins as a non-privileged user, and then do a sudo to become root.

There can be many reasons why you don't want root to login directly. You may be concerned about security. Brute force attacks by guessing the password are common. In addition to security, you may be concerned about traceability. If there are more than 1 administrator on a system, and they can all login as root, then it is impossible to trace who had done what (after all, it is the same root account).

As an alternative, we can configure sshd such that root can remote login directly, but only with public key authentication. From the security perspective, public key authentication offers much better protection than password. If being able to trace the user is not that important (say there is only 1 root user), then you may wish to consider such a configuration. Note: remote login by root using password authentication is still disallowed.

  1. As root, edit the sshd daemon configuration file (/etc/ssh/sshd_config).
  2. Modify the PermitRootLogin and the PubkeyAuthentication parameters to have the following values.
    PermitRootLogin without-password
    PubkeyAuthentication yes
    
  3. Restart the sshd daemon.
    $ service sshd restart
    

Thursday, September 26, 2013

Extract audio track from a youtube video

Youtube is a great source for watching videos or listening to music on-line via their website. But if you want to download the video or audio to your computer, you need some special tool, and you need to know the URL for the youtube video you wish to download.

One such tool is youtube-dl, which is a python script. Unfortunately, youtube-dl is not pre-packaged with Debian Wheezy.

I downloaded the script directly from this web page:

$ sudo curl https://yt-dl.org/downloads/2013.09.24.2/youtube-dl -o /usr/local/bin/youtube-dl
$ sudo chmod a+x /usr/local/bin/youtube-dl

The syntax of youtube-dl is quite straight-forward.

To download the complete youtube video (with the soundtrack), just provide the URL of the video as a single argument.

$ youtube-dl http://www.youtube.com/watch?v=O-xlvalecI8 
[youtube] Setting language
[youtube] O-xlvalecI8: Downloading video webpage
[youtube] O-xlvalecI8: Downloading video info webpage
[youtube] O-xlvalecI8: Extracting video information
[youtube] O-xlvalecI8: Encrypted signatures detected.
[youtube] O-xlvalecI8: Downloading js player vflUKrNpT
[download] Destination: Give me oil in my lamp-O-xlvalecI8.flv
[download] 100% of 11.73MiB in 00:43

This creates a Flash Video (.flv) file in your local hard drive. To watch the video off-line, open the .flv file with a media player application such as VLC or Totem.

If it is just the sound track that you want, not the complete video, you can still use youtube-dl. However, to do audio extraction, youtube-dl requires 2 extra programs to be installed. Namely, it requires ffmpeg or avconv, and ffprobe or avprobe.

On my Debian Wheezy system, I installed avconv and avprobe by simply installing this package:

$ apt-get install libav-tools

Finally, you can run youtube-dl like this to extract the audio track only:

$ youtube-dl --extract-audio --audio-format mp3   http://www.youtube.com/watch?v=O-xlvalecI8 
[youtube] Setting language
[youtube] O-xlvalecI8: Downloading video webpage
[youtube] O-xlvalecI8: Downloading video info webpage
[youtube] O-xlvalecI8: Extracting video information
[download] Destination: Give me oil in my lamp-O-xlvalecI8.flv
[download] 100% of 11.73MiB in 00:32
[avconv] Destination: Give me oil in my lamp-O-xlvalecI8.mp3
Deleting original file Give me oil in my lamp-O-xlvalecI8.flv (pass -k to keep)
The --audio-format parameter lets you specify the output audio format. The above command generates a mp3 file on your local hard drive. Besides mp3, you can specify other audio formats such as wav. For detailed help about the parameters, run:
$ youtube-dl --help

Monday, May 20, 2013

X11 Forwarding over SSH: run remote graphical app and display locally

In the modern networked environment, we often wish to run an application on a remote host while we are comfortably logged in on our local computer.

Assuming both machines are Linux-based, and the application runs on the graphical X desktop, the following approaches come to mind:

  • VNC
  • X11 forwarding over SSH

This article focuses only on X11 forwarding. X11 forwarding over SSH enables you to run a remote X app and display it locally, with traffic between the 2 hosts encrypted by SSH.

For X11 forwarding over SSH to work, both the SSH client and SSH server must be properly configured.

X11 forwarding must be enabled on The SSH server side. This is the machine where the application resides. To enable the feature, make sure the X11 configuration file /etc/ssh/sshd_config on the server contains this line:

X11Forwarding yes

If you edit the said file, you need to restart the sshd daemon for the change to take effect.

On Debian or Ubuntu systems, you restart the SSH daemon like this:

$ sudo service ssh restart
[ ok ] Restarting OpenBSD Secure Shell server: sshd.
$

On the ssh client side, you need to run SSH command with the proper parameters. For instance, suppose you want to run the xclock application on the remote SSH server and have it displayed back on the local client.

$ ssh -fX peter@192.168.1.112 xclock 
peter@192.168.1.112's password: 
$

The -X parameter allows an one-off X11 forwarding session.

The -f parameter instructs the SSH client to go to the background just before xclock is run.

If you want to permanently enable X11 forwarding for an user, insert this line in the user's own ~/.ssh/config file on the local host.

ForwardX11 yes 

With X11 forwarding permanently enabled for the client, you can leave out the -X parameter:

$ ssh -f peter@192.168.1.112 xclock 
peter@192.168.1.112's password: 
$

If X11 forwarding is not enabled on the SSH server, any attempt to tunnel X11 will fail with the following error message:

$ ssh -X peter@192.168.1.112 xclock 
peter@192.168.1.112's password: 
X11 forwarding request failed on channel 0
Error: Can't open display: 
$
If X11 forwarding is properly enabled on the server side, you will see a nice looking clock displayed on your local screen.

Thursday, May 2, 2013

Forcing pseudo terminal on ssh command execution

You already know how to execute a command on a remote computer via ssh.

The syntax is like this:

$ ssh peter@192.168.1.112 

This will work if the command is simply piping output, for example, ls.

If the command is "screen-based" in that it interprets user input, you may get an error. The following shows what happens when you ssh to run such programs (e.g., top, emacs, screen).

$ ssh peter@192.168.1.112 top
peter@192.168.1.112's password: 
TERM environment variable not set.
$ ssh peter@192.168.1.112 emacs
peter@192.168.1.112's password: 
emacs: standard input is not a tty
$ ssh peter@192.168.1.112 screen
peter@192.168.1.112's password: 
Must be connected to a terminal.

Here is a high-level explanation of what is happening behind the scene.

When you run ssh without a command just to login, a pseudo tty is automatically allocated. But if you specify a command to execute on the ssh command line, by default, ssh does not allocate a pseudo tty. You need to force it to allocate one if you want to run commands such as top or screen. This you do by giving the -t parameter to ssh.

$ ssh -t peter@192.168.1.112 top
peter@192.168.1.112's password: 
top - 11:09:46 up 133 days, 13:44,  5 users,  load average: 0.00, 0.00, 0.00
Tasks: 201 total,   1 running, 200 sleeping,   0 stopped,   0 zombie
Cpu(s):  0.0%us,  0.2%sy,  0.0%ni, 99.8%id,  0.0%wa,  0.0%hi,  0.0%si,  0.0%st
Mem:   1938896k total,  1466144k used,   472752k free,   592508k buffers
Swap:        0k total,        0k used,        0k free,   508120k cached

  PID USER      PR  NI  VIRT  RES  SHR S %CPU %MEM    TIME+  COMMAND
22176 peter     20   0  2856 1296  984 R  0.3  0.1   0:00.07 top
    1 root      20   0  3944  572  332 S  0.0  0.0   0:02.80 init
    2 root      20   0     0    0    0 S  0.0  0.0   0:00.17 kthreadd
    3 root      RT   0     0    0    0 S  0.0  0.0   0:09.22 migration/0
    4 root      20   0     0    0    0 S  0.0  0.0 406:20.92 ksoftirqd/0
    5 root      RT   0     0    0    0 S  0.0  0.0   0:00.03 migration/0

In summary, if you run ssh with a command argument to execute on a remote server, and you see an error message that suggests a terminal is not configured, run it again with the -t parameter.

Monday, April 22, 2013

One-liner to shutdown remote host

To shutdown the local machine immediately, you execute this command as root or under sudo:
$ shutdown -h now

If it is a remote server that you want to shutdown, it could be slightly more involved.

You need to have root privileges to shutdown a machine. However, many systems are configured to block root from logging in remotely usingssh. So, you need to ssh in as a regular, non-root user, and pass the sudo command to shutdown host.

$ ssh -t peter@192.168.1.112 'sudo shutdown -h now'
peter@192.168.1.112's password: 
[sudo] password for peter: 
Broadcast message from root@tiger (pts/2) (Sat Apr 13 10:56:30 2013):

The system is going down for system halt NOW!
Connection to 192.168.1.112 closed.
$ 

Don't forget the -t sshparameter to "force pseudo-tty allocation". Without it, the above one-liner will fail with this message.

sudo: no tty present and no askpass program specified

Note that you will be prompted twice to type in your password. The first time is for ssh; the second, sudo.

To avoid typing the first password, set up password-less login. This is a topic by itself, and I won't go into it here.

To avoid the second, configure sudo to not prompt peter for his password when he issues a sudo command. This is done by editing the /etc/sudoers file.

$ visudo

Insert the following line to the file:

peter ALL=(ALL) NOPASSWD: ALL

The above line allows peter to sudo as anybody from any host and run any command without being authenticated. Only do this after you have considered its security ramifications. You have been forewarned.

Now run the one-liner again.

$ ssh -t peter@192.168.1.112 'sudo shutdown -h now'
peter@192.168.1.112's password: 

Broadcast message from root@tiger (pts/1) (Sat Apr 20 21:40:50 2013):

The system is going down for system halt NOW!
Connection to 192.168.1.112 closed.
The user is only prompted once, by ssh, to enter a password.

Friday, April 19, 2013

One-liner to copy text to a remote host

Occasionally, I want to copy a short line of text to a remote computer. For instance, I have an URL for some real cool web site which, for whatever reason, I want to send to a remote host. I can always put the text in a file, and transfer it via scp.

$ cat > coolurl.txt
http://really-cool-web-site/

$ scp coolurl.txt peter@192.168.1.112:

Or, you can use the following one-liner command:

$ echo 'http://really-cool-web-site/'|ssh peter@192.168.1.112 'cat >coolurl.txt'

The one-liner uses only simple commands such as echo, ssh and cat. It saves you the step of creating a new file on the local machine.

The text is saved to a file called coolurl.txt on the remote computer under your home directory.

Let me know your favourite way to accomplish the same thing.

Saturday, March 16, 2013

Identify available printer names

Some machines have access to more than one printer. Unless the default printer is the one you want, you need to know the name of the printer to use in the printer-related command. For instance, if you want to know the status of a printer, you execute the lpq command:

$ lpq
ml1640 is ready
no entries

ml1640 is the default printer for the machine. If you want a printer other than the default, the lpq command requires that you specify the printer name. Other commands such as lpr, and lprm behave the same way.

How do you find out the printer name that the Linux printing system will recognize?

$ lpstat -a
clp325w accepting requests since Tue 12 Mar 2013 09:42:07 PM PDT
ml1640 accepting requests since Sun 10 Mar 2013 09:22:33 PM PDT
scx3405 accepting requests since Sun 10 Mar 2013 09:24:00 PM PDT

Armed with the printer name scx3405, you simply run lpq again like this:

$ lpq -P scx3405
scx3405 is ready
no entries

If you run lpstat with the -s parameter, it will give even more information in the form of a status summary (including identifying the default printer):

$ lpstat -s
system default destination: ml1640
device for clp325w: ipp://192.168.1.22
device for ml1640: mfp:/dev/mfp4
device for scx3405: ipp://192.168.1.11

You can tell then ml1640, the default printer, is a local printer, and the rest are remote.

With lpstat, you can list the printer names that the Linux printing system can recognize.

Friday, March 8, 2013

Deciphering mysql error codes

I was tasked to upgrade the mysql server running on the Centos server.

Of course, the first thing I should do was to backup my database. I run the mysqldump command below to write out the sql statements that will re-create and populate the database tables.

# mysqldump -uroot -p -l --opt --all-databases=true > /root/mysqlall.sql
mysqldump: Couldn't execute 'show fields from `asset`': Got error 28 from storage engine (1030)

Lo and behold, I got an "error 28". What is "error 28"? The error message has no useful details that could help me troubleshoot.

The perror command came in handy in that situation.

# perror 28
OS error code  28:  No space left on device

Now, a quick df command confirmed that the hard-drive was full.

perror explains system error codes generated by mysql and the base OS(Linux).

Saturday, March 2, 2013

Auto fill in ssh client parameters

I often ssh to different servers, both at work and at home. Often, the Linux account name is different according to which server I'm logging in. Also, some servers are set up to allow ssh login through a different port than the default port 22. For instance, to login to 123.123.123.123, I need to type all this in:

# ssh -p 2222 admin_2@123.123.123.123

All of this can become human unmanageable rather quickly.

Luckily, I can set up the ssh client such that it fills in ssh login parameters such as port number and user name.

I simply type ssh followed by the IP address or hostname of the computer I want to login. ssh fills in the right port # and user name according to the IP or hostname.

# ssh 123.123.123.123
admin_2@123.123.123.123's password: 

To set it up, insert the following lines into your personal ssh client configuration file, ~/.ssh/config.

Host 123.123.123.123
   User admin_2
   Port 2222

Note that you should edit the configuration file on the ssh client computer. In other words, the setup is on the source computer from which you initiate the ssh request, not the target server that you want to login to.

Alternatively, you can make the change for all users. Insert the same lines into the system-wide ssh client configuration file. For Debian-based distributions, the file is /etc/ssh/ssh_config. You will need root access to edit that file.

After you make the edits, any new ssh client login will have the port and user name filled in automatically.

In addition to ssh, programs such as scp and sftp will also benefit from these settings.

# scp afile.txt  123.123.123.123:
admin_2@123.123.123.123's password: 
afile.txt                                  100%  198     0.2KB/s   00:00    

If you like this article, you may find this article interesting:

How to disable ssh host key checking

Saturday, February 23, 2013

Splitting up is easy for a PDF file

Occasionally, I needed to extract some pages from a multi-page pdf document. Suppose you have a 6-page pdf document named myoldfile.pdf. You want to extract into a new pdf file mynewfile.pdf containing only pages 1 and 2, 4 and 5 from myoldfile.pdf.

I did exactly that using pdktk, a command-line tool.

If pdftk is not already installed, install it like this on a Debian or Ubuntu-based computer.

$ sudo apt-get update
$ sudo apt-get install pdftk

Then, to make a new pdf with just pages 1, 2, 4, and 5 from the old pdf, do this:

$ pdftk myoldfile.pdf cat 1 2 4 5 output mynewfile.pdf

Note that cat and output are special pdftk keywords. cat specifies the operation to perform on the input file. output signals that what follows is the name of the output pdf file.

You can specify page ranges like this:

$ pdftk myoldfile.pdf cat 1-2 4-5 output mynewfile.pdf

pdftk has a few more tricks in its back pocket. For example, you can specify a burst operation to split each page in the input file into a separate output file.

$ pdftk myoldfile.pdf burst 

By default, the output files are named pg_0001.pdf, pg_0002.pdf, etc.

pdftk is also capable of merging multiple pdf files into one pdf.

$ pdftk pg_0001.pdf pg_0002.pdf pg_0004.pdf pg_0005.pdf output mynewfile.pdf 

That would merge the files corresponding to the first, second, fourth and fifth pages into a single output pdf.

If you know of another easy way to split up pages from a pdf file, please tell us in a comment. Much appreciated.

Two updates (part 2, part 3) are available for this post.