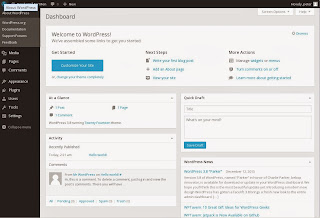
This blog is built on the Google Blogger platform. My new blog however will switch to WordPress, and most likely be hosted by a third-party web hosting company. For now, I want to install WordPress on my home computer to be the staging server. This is where I experiment with new ideas before I upload the final contents to the production WordPress server.
My home computer runs Debian 7 (aka Wheezy) which includes a WordPress package, albeit a little outdated (3.6.1). This post is an overview of how to install the most recent WordPress release on Debian Wheezy.
The instructions below assume you have root privilege and command line access to the server. If you are using a web hosting company, the instructions will not apply because the web hosting company most likely will provide its own tools (e.g., cPanel).
Software Dependencies
To install and run the latest WordPress release, you need to have the following packages already installed.
- Apache2
- MySQL5 (version 5.0 or greater)
- PHP5 (version 5.2.4 or greater)
- SMTP server (e.g., exim4)
Although a SMTP server is not required for installation, WordPress cannot send email without one.
It turns out that Debian Wheezy already includes the above software packages with the proper versions in the distribution. You just need to ensure that they are installed on your system.
To verify if a package is installed, use the dpkg command with -l parameter.
The following example indicates that PHP5 is NOT currently installed:
$ dpkg -l php5*
dpkg-query: no packages found matching php5*
If a package is already installed, the dpkg output will look something like this (edited to fit the screen):
$ dpkg -l mysql*
Desired=Unknown/Install/Remove/Purge/Hold
| Status=Not/Inst/Conf-files/Unpacked/halF-conf/Half-inst/trig-aWait/Trig-pend
|/ Err?=(none)/Reinst-required (Status,Err: uppercase=bad)
||/ Name                  Version             Arch    Description
+++-=====================-===================-=======-====================================
ii  mysql-client          5.5.31+dfsg-0+wheez all     MySQL database client (metapackage)
ii  mysql-client-5.5      5.5.31+dfsg-0+wheez amd64   MySQL database client binaries
ii  mysql-common          5.5.31+dfsg-0+wheez all     MySQL database common files
ii  mysql-server          5.5.31+dfsg-0+wheez all     MySQL database server (metapackage)
ii  mysql-server-5.5      5.5.31+dfsg-0+wheez amd64   MySQL database server binaries
ii  mysql-server-core-5.5 5.5.31+dfsg-0+wheez amd64   MySQL database server binaries
Apache2
To install Apache2:
$ sudo apt-get install apache2
The Apache module mod_rewrite needs to be enabled. Otherwise, WordPress cannot be configured to have more user-friendly URLs. The exact procedure for enabling the module is covered in a later post.
MySQL5
To install MySQL 5:
$ sudo apt-get install mysql-server mysql-client
PHP5
To install PHP5 and related modules:
$ sudo apt-get install php5 php5-mysql php5-gd php5-curl
Notes:
- php5-gd is only required if you want to enable CAPTCHA checking in your WordPress deployment.
- Although php5-curl is not a prerequisite of the WordPress core, it is required by some very popular WordPress plugins such as Google Analyticator.
SMTP Server
exim4 is the default SMTP server on Debian wheezy. However, exim4 is configured out of the box for local email delivery only. A later post outlines the steps to configure exim4 to send email to external email servers through Google Gmail.Install WordPress
- Download the latest WordPress tar-ball or zip file from the WordPress web site.
- Decompress the downloaded file to a temporary location on your hard drive.
The examples below decompress the file to ~/tmp (the tmp sub-directory under your home directory).
For tar-ball:
$ tar -C ~/tmp/ -zxvf latest.tar.gz
For zip file:
$ unzip -d ~/tmp/ latest.zip
- Create database and database user.
The following mysql commands create a database named wordpress, and a corresponding database user named wp, who has all privileges for the database. Customize with your own database name, user name, and user password.
$ mysql -u root -p
Enter password:
mysql> CREATE DATABASE wordpress CHARACTER SET utf8;
Query OK, 1 row affected (0.01 sec)
mysql> GRANT ALL PRIVILEGES ON wordpress.* TO 'wp'@'localhost' IDENTIFIED BY 'REPLACE_WITH_YOUR_USER_PASSWORD';
Query OK, 0 rows affected (0.00 sec)
mysql> GRANT ALL PRIVILEGES ON wordpress.* TO 'wp'@'%' IDENTIFIED BY 'REPLACE_WITH_YOUR_USER_PASSWORD';
Query OK, 0 rows affected (0.00 sec)
mysql> FLUSH PRIVILEGES;
Query OK, 0 rows affected (0.00 sec)
- Create configuration file.
Rename the sample configuration file.
$ cd ~/tmp/wordpress
$ cp wp-config-sample.php wp-config.php
Edit ~/tmp/wordpress/wp-config.php.
Locate the following lines, and replace the values with your own values.
define('DB_NAME', 'wordpress');
define('DB_USER', 'wp');
define('DB_PASSWORD', 'REPLACE_WITH_YOUR_USER_PASSWORD');

define('AUTH_KEY', 'put your unique phrase here');
define('SECURE_AUTH_KEY', 'put your unique phrase here');
define('LOGGED_IN_KEY',   'put your unique phrase here');
define('NONCE_KEY', 'put your unique phrase here');
define('AUTH_SALT', 'put your unique phrase here');
define('SECURE_AUTH_SALT', 'put your unique phrase here');
define('LOGGED_IN_SALT', 'put your unique phrase here');
define('NONCE_SALT', 'put your unique phrase here');
For the security keys and SALTs, replace the values with long, random strings of gibberish. For instance, something like t`DK%X:>xy|e-Z(BXb/f(Ur`8#~UzUQG-^_Cs_GHs5U-&Wb?pgn^p8(2@}IcnCa| is a good choice.
- Copy WordPress to the web server's document root directory.
For Debian Wheezy, the Apache document root directory is located at /var/www. In the example below, I put wordpress under a subdirectory named myblog. The URL of the blog will look like http://localhost/myblog.
$ sudo mkdir /var/www/myblog
$ sudo cp -pr ~/tmp/wordpress/*  /var/www/myblog/
- Change owner/group of WordPress files to the web server user.
To use the one-click upgrade feature of WordPress after the initial install, the web server must be granted the proper file permissions to update the WordPress-related files.
First, identify the user under which the Apache web server executes.
$ ps aux |grep -i apache
...
www-data  7012  0.0  0.1 169576 27472 ?        S    08:59   0:01 /usr/sbin/apache2 -k start
...
Then, modify owner and group of WordPress files to that user, www-data.
$ sudo chown -R www-data:www-data /var/wwww/myblog
[sudo] password for peter:
- Run the install script.
Open a browser, and enter this URL:
http://localhost/myblog/wp-admin/install.php

- Fill in the information, and click Install.

- Login using the credentials you just created.

The WordPress web site claims that if you know what you are doing, the install will take only 5 minutes. For Debian Wheezy, given that all the pre-requisite software dependencies are already satisfied by the base distribution, this claim may not be that far from the truth.
Let me know your experience.
Below are my other posts on WordPress:


